Showing posts with label Healthy. Show all posts

Thursday, February 13, 2014

Mango-Chickpeas Salad


I like chickpeas, so the other day I cooked some chickpeas for evening tea and wanted to do something other than the usual Chickpeas sundal. As I was gazing through my refrigerator looking for inspiration to add to my chickpeas, a bag of frozen mangoes caught my eyes. The poor thing has been sitting in the freezer since last summer and I decided to give it a try with my chickpeas. The result was great. Hope you like this simple, healthy and refreshing salad. 

Ingredients:

  • Mango - 1 cup, diced. (Fresh or frozen. Thaw frozen mango before using)
  • Chickpeas - 1 1/2 cups cooked (Add a little salt while cooking the chickpeas)
  • Onion - 1/2, diced
  • Red pepper (capsicum) - 1/2 diced
  • lemon juice - from 1/2
  • Salt -1/2 tsp or to taste. 
  • Dry red chili flakes - to taste
Steps:
  • Combine all the ingredients together.
  • Add salt carefully as the cooked chickpeas has salt already added. 
  • Refrigerate for a while before serving.
  • You can always add more or less of each ingredient to your liking.


Saturday, October 19, 2013

Peerkangai Thol (Ridge Gourd Peel) Chutney


This is a versatile vegetable I should say, you get two dishes out of 1 vegetable. The skin is bit tough, so you can peel it off and make a chutney (dip) with it and a poriyal (stir-fry) with the rest, for which you can find the recipe here, Peerkangai poriyal. So lets get started with the chutney for now. 


Ingredients:
  • Peekangai thol (Peel of ridge gourd) -  from 2
  • Coconut meat - 2 inches, chopped
  • Dry red chillies - 2 or 3, to taste
  • Ginger - 1/4 inch, chopped
  • Urad dal - 2 tsp
  • Gram dal - 1tsp
  • Asafoetida - A pinch
  • Tamarind - 1/2 inch
  • Oil - 1 tblspn
  • Salt - 1 tsp, or to taste
For tempering
  • Oil - 2tspn
  • Mustard seeds - 1tspn
  • Urad dal - 1 tspn
  • Dry red chillies - 1, broken.
Steps:
  • Heat oil in a pan, when hot, add ural dal, gram dal, red chillies, asafoetida, and ginger and sauté for a minute.
  • Then add the peel, coconut, tamarind and salt and sauté well for couple of mins.
  • Cover and cook for 5 mins.
  • Turn off heat. Cool and grind to a paste by adding water. Grind to desired consistency.
  • Tempering: In a pan, add oil, when oil is hot, add mustard seeds, once it crackles add the rest of the ingredients. Add this hot oil mixture to the ground chutney. It will sizzle. Mix well. 
  • Serve with idly, dosa or mix with plain white rice. 


Tuesday, October 15, 2013

Oven baked Tandoori Chicken (Whole)


Thanksgiving (Canadian) is usually celebrated with turkey, but my husband and I are not big fans of turkey meat, so we decided we will start a new tradition of an Indian thanksgiving with Tandoori chicken :) . I've always wanted to roast a whole chicken instead of cut pieces and this was a good opportunity for me to try it, and it was awesome. Its real simple. Just marinate and bake.

Here are some things you need to know before you start: 
  • You have to marinate the whole chicken over night for the best result.
  • Use yogurt (Curd) that is thick. 
  • You need at least 1 hour to bake, so plan before you start. 
Ingredients:
  • Whole chicken skinned - 1
Initial rub:
  • Salt - 1 Tspn
  • Lemon juice - from 1/2
  • Chilli powder - 1 Tspn (optional, if you like it spicy)
For Marinate:
  • Yogurt (Curd) - 3 Tblspn
  • Ginger garlic paste- 1 Tblspn
  • Tandoori chicken masala powder* - 2 to 3 Tblspn based on how spicy you want it (I suggest you taste the powder first, yes! taste it, to see how salty and spicy it is)
  • Coriander powder - 1/2 Tspn
  • Salt - 1/2 Tspn 
  • Corn flour - 1 Tspn + 1 Tspn (For top coating)
  • Oil - 2 Tspn
* Or use 1 tspn each of cumin powder, chilli powder, garam masala, dry fenugreek leaves and 1/2 tspn of red food colour.

Final Touch after baking:
  • Lemon juice - from 1/2
Steps:


  • Clean chicken well and pat dry with a paper towel or clean dish cloth.
  • Pierce the chicken with a knife, push it really well into the chicken, not just the surface so that the marinate will get into the flesh. You may want to do some deep cuts in the chicken's breasts as they are white meat, the toughest.
  • Mix the ingredients of the initial rub together and spread all over the chicken and into the cuts and pierces.
  • Next mix the ingredients of the marinate.
  • Spread the marinate well all over the chicken again and inside the cavity too. Cover and refrigerate over night.
Next day:
  • Take out the chicken from the fridge and keep it out for about half hour at least to come to room temperature (preferably 1 hour)
  • Preheat oven to 400 F.
  • Now, dust the marinated chicken with corn flour using a stainless steel strainer for even coating. This will give you a nice crisp layer on top. 
  • Drizzle oil all over the chicken.
  • Place chicken breast side down on a rack* and bake. This will ensure even cooking all over at the same time.
  • Bake for 25 minutes, then flip the chicken around and bake for 20 minutes. Then again flip it and bake for extra 20 mins.
  • After the 65 mins, raise temperature to 425 F and bake for 5 mins for the final browning on the top. Not for too long or you will dry out the chicken.
  • Remove from the oven and squeeze a fresh lime or lemon all over the chicken.
  • Cover the cooked chicken with aluminium foil for 5 to 10 mins to rest before you serve.

* - I used a cooling rack, I placed it on a foil covered baking pan so that the dripping does not stain the pan. If you have a roaster with a rack at home use that. 


If you do not have a roaster or a cooling rack to bake on, don't worry, place chicken on a foil covered pan and remove the drippings from the chicken each time you turn.

Thursday, October 10, 2013

Quick Channa (Chickpeas) Masala


This is a quick take on the traditional Channa masala recipe. I always have 3 kinds of store bought spice powder/mix at home, biriyani masala, chicken masala and tandoori chicken masala. The one I mostly use is the chicken masala, any curry (gravy) I make and I toss a spoonful (or sometimes more) in it. On my son's birthday I was making so many things and  in a hurry instead of adding chicken masala I ended up adding tandoori chicken masala and it turned out better than usual :) and I have stuck with it ever since. You just need few ingredients and 1 pressure cooker for fast results.  

Ingredients:
  • Channa / Chickpeas - 1 or 2 cups (Soak in water for couple of hours)
  • Onion - 1 chopped
  • Tomato purée / crushed tomato - 3/4 cup
  • Ginger garlic paste - 1 tblspn
  • Tandoori chicken masala - 1 1/2 tblpsn
  • Coriander powder - 2 tspn
  • Water - 2 Cups
  • Salt - To taste
  • Lime - 1/2
  • Oil - 2 tblspn
  • Fennel seeds - 1/2 tspn
  • Cinnamon stick - 1
Steps:

     
  • In a pressure cooker, heat oil, when hot add fennel seeds, cinnamon stick and onions and sauté.
  • When the onion changes colour slightly add the ginger garlic paste and sauté. 
  • Add the tandoori chicken masala, salt, Coriander powder and Tandori chicken masala and sauté, add the tomato purée and sauté for 3 mins.
  • Drain the soaking channa and add to the mixture in the pressure cooker. Stir.
  • Add water. (water should cover the channa and be 1 or 2 cms above it. Add more or less water depending on this measurement)
  • Add more salt if needed. Close and put the weight on the pressure cooker. 
  • Cook for 15- 20 mins. 
  • Release pressure and open. Squeeze lime in. Randomly mash the channa with a potato masher to make a thick consistency of your choice, or take some channa out, blend it in a blender and add it back to the mixture. 

Wednesday, August 21, 2013

Mango Salad


I love mangoes, I think most Indians do, after all India does have the best mangoes :) Here in Canada we get mangoes from California and Mexico, don't get me wrong, they are good, but they cannot compete with Indian mangoes when it comes to taste. If you have not tasted Indian mangoes you've missed something great, even the skin of Indian mangoes taste great.

I found some green Mexican mangoes the other day at the supermarket, they taste like half ripe Kili mooku (parrot- beak) mango, but have bitter skin. I remembered eating a salad made of mangoes long time ago and decided to make it. The mango salad is very refreshing and light. 


Ingredients:

  • Mango - 1, thinly sliced. (Any variety of mango, that is firm and not too sweet will work) 
  • Carrot - 1, medium size, thinly sliced
  • Red Onion - 1/2, thinly sliced
  • Red pepper (Capsicum) -1/2, thinly sliced. You can use green pepper if you cant find red.
  • Coriander Leaves -  Handful, finely chopped.
Dressing:
  • Lemon juice from half a lemon
  • Ginger - 1/4 inch, finely grated
  • Hot sauce/Chilli sauce - 1/2 tsp or more
  • Salt - 1/4 Tsp
  • Sugar - 3/4 tsp
Steps:
  • Mix all the sliced veggies and mangoes together.
  • Mix together the ingredients of the dressing.
  • Combine the dressing and the salad well using your fingers. 
  • Refrigerate for a while, it will bring out the flavours really well. Then serve.


Wednesday, August 7, 2013

Cranberry Banana Oat Muffin


Last year during Christmas a baking ingredients company sent a free copy of a little recipe book using their products and coupons for the same to everyone in our city . It had some really nice and simple recipes, so I saved it and after 8 months tried one today. Its called a breakfast muffin, Its health and literally has everything you eat for a breakfast in it.  I made some changes to the ingredients, like swapping white sugar for brown sugar, oil for butter, added vanilla extract and adjusted the amount of Banana added. Don't worry if you can't find cranberries, you can substitute cranberries with raisins, it will be just as yummy.

Ingredients:

  • Whole wheat flour - 1 1/4 cups
  • Oats -1 1/4 cups300 mL
  • Brown sugar - 2/3 cup
  • Baking Powder -1 1/2 tsp
  • Baking Soda- 1 tsp
  • Salt - 1/2 tsp
  • Egg - 1 
  • Vanilla extract -1 tsp
  • Banana - 2 mashed ( Original recipe calls for 2 cups of mashed banana, I'm sure it will be more than 2 bananas, I had only 2 at home, so added 1/4 cup of milk to add more moisture)
  • Oil - 1/3 cup
  • Milk -1/4 Cup (You can avoid this and add more mashed banana)
  • Dry cranberries or raisins -3/4 cup
Steps:

  • Sift the flour and combine first six dry ingredients in mixing bowl. Mix well.
  • Beat egg, mashed banana, oil and vanilla extract together until smooth.
  • Add banana mixture to dry ingredients. Stir, add the milk. Stir gently until well combined and moistened. 
  • Stir in the cranberries or raisins.
  • The batter will be thick.
  • Line a muffin pan and fill it 3/4.
  • Bake at 375ºF for 15-20 minutes based on your oven. You know your done when you insert a knife and it comes out clean


Monday, August 5, 2013

Home made Mediterranean Burgers


I decided to make my own burger patties after watching an Ad on TV. So I searched the Internet for recipes  and combined ideas from each and here is the result. 

Ingredients:
  • Ground (minced) beef : 500 gms
  • Egg -1
  • Garlic cloves - 3, finely chopped
  • Onion - 1/2 finely chopped
  • Green chilli - 3 finely chopped. (You can remove the seeds if you don't like too much heat)
  • Mint leaves - 2 strands, finely chop the leaves alone
  • Bread crumbs - made from 1 slice of bread, recipe here
  • Salt - 1 1/2 tsp
  • Black pepper powder - 1 tsp
  • Sun dried tomato in oil - 1 finely chopped  (optional)
Steps:


  • Beat egg with salt and pepper.
  • Add rest of the ingredients and combine well. Punch, squeeze and run your fingers through the mixture till the meat is smooth and combined. 
  • Take a handful of the mixture, make a ball and then flatten it. Make a small depression in the middle, not too deep tough just a little with your thumb. This will make sure that the patties stay flat when its cooking.
  • Keep the patties on a separate piece of parchment paper or aluminium foil. It will be easy to flip them on to the grill.
  • Light the grill and when it reaches 400 F, spray oil on the grill and place the patties and close the grill.
  • Cook for 10- 12 mins closed. Then flip them, close and cook again for another 10 to 12 mins.
  • If you like cheese, place a slice of your favourite cheese on top and close. Turn off heat. Open after a minute. 
  • Your done. Use condiments and topping of your choice.
For those without a grill, use a flat pan or a grill pan to make it on the stove top.


Condiments and topping suggestions:
  • Lettuce
  •  Tomato slice
  • Mayonnaise
  • Mustard
  • Tomato ketchup
  • Hot sauce


Tuesday, July 16, 2013

Vegetable (Soup) Rasam


I came up with this recipe when my son fell sick 2 weeks ago, with fever and throat infection... long story short, he refused to eat anything. Tried making soups for him and he did not like them.. then since he likes rasam, I thought OK, rasam might be soothing to his throat and be nice to taste while sick. But  had to come up with a healthy alternate to Rasam; to make it a little nutritious for him. Rasam is tasty and good for digestion, but in the end its just tamarind water. So, I incorporated the vegetable soup I had made for him in the rasam and he liked the tangy taste and ate a little. This will be a good way to incorporate veggies into children's and adult's  diet too.


Ingredients:
  • Tamarind - Soak a small lemon sized ball of tamarind in 1/2 cup of warm water
  • Cumin seeds - 2 Tsp
  • Pepper Corns - 1 Tsp
  • Garlic - 2 cloves
  • Asafoetida - 1/2 tsp
  • Tomato - 1
  • Mustard seeds - 1Tsp
  • Dry red chilis - 1
  • Curry leaves - 1 Strand
  • Coriander leaves - Finely chopped, handful or less
For Vegetable soup:
  • Vegetables : Whatever you have at home, except bitter ones. Here is a list of what I use, I had these at home, nothing specific.
    • 1/2 Onion
    • 1/2 tomato
    • 1 Potato
    • 1/2 Zucchini
    • Handful of Spinach leaves
    • 5 florets of Broccoli
    • 1 stick of Celery
    • 1 Carrot
  • Tumeric - 1/2 tsp
  • Salt - To taste
  • Cumin Seeds- 1Tsp
  • Ginger - Small piece, chopped roughly
  • Garlic - 3 or 4 cloves
  • Water -3 or 4 cups
Steps:

The steps are easy. First make soup, then use the soup to make rasam.
  •  Make the soup: In a Presuure cooker, put all the ingredients listed under 'For Vegetable soup:' and add enough water to cover all the vegetables.
  • Cook on medium high until you hear 3 - 4 whistles. We want to all the vegetables to cook and disintegrate in the water.
  • Switch off cooker and wait for pressure to release. 
  • Then open the cooker and strain the contents, into a big vessel. Nicely press and mash them thru the strainer and get all the water out of the cooked vegetables. Don't throw the mashed vegetables just yet. 
  • Put it back in the pressure cooker and add just a cup or 2 of water and pressure cook it once more for 1 or 2 whistles.
  • Repeat the whole straining process. This way we have not left any valuable nutrients in the vegetables.
  •  Prepare for rasam: In a mixer grinder, grind together cumin seeds, pepper corns, garlic and asafoetida into a course paste.
  • Heat oil in a wok. When hot add mustard seeds. When they crackle add Dry red chilli and the ground mixture and saute.
  •  Then add the tamarind pulp (Squeeze the tamarind soaked in water to get pulp, use the soup to dissolve the tamarind a second time and squeeze again, repeat until all the flavor is extracted from the tamarind). 
  •  Now add the soup into the wok and stir well. Cut the tomato into big chunks and add into the rasam. You can squeeze the juices into the rasam as you add it. Add salt as required.
  • Add rasam powder if you like, I did not. 
  • Bring the contents to boil.
  • Now add the curry leaves and coriander leaves. Let boil for a min and switch off. I like to add curry leaves in the end as it gives out more aroma than when adding first. 
  • Your done.

Monday, July 8, 2013

Fresh Bread Crumbs


Bread crumbs is one of those not-so-frequently used ingredients. In the past I used to buy big boxes to make something and would have more than half the box full of bread crumbs sitting in my pantry for months together and finally end up in the garbage. But in the last three years or so I have started making my own bread crumbs with the end pieces of a bread loaf that no one wants to eat or left over pieces of bread. 

Once a loaf of bread gets over I just wrap the end pieces and pop it into the freezer. And when I need bread crumbs I take those end pieces from the freezer and make bread crumbs. It is super easy and its a nice way to avoid wasting precious food.

Ingredients:

Bread - Any kind. (bread ends or old bread, but not spoilt ones) 

Steps:
  •  Toast Bread: Toast bread till brown on  both sides. I use a toaster to do it, its easy and fast. You can also pop the bread into the over at 400F for sometime or use a pan on stove top and toast the bread on both sides till. If using bread from the freezer, let it thaw before you toast it. Or is if toaster has option to toast frozen bread go ahead and toast it directly. 
  •  Grind the toasted Bread: Once the bread is cool, break it into chunks. Use a mixer grinder or food processor to grind the bread chunks into desired texture. If you want it extra dry, just spread the ground crumbs on a baking sheet and bake for couple of mins.
Here's a recipe I used these bread crumbs on  Baked Tilapia


Monday, June 24, 2013

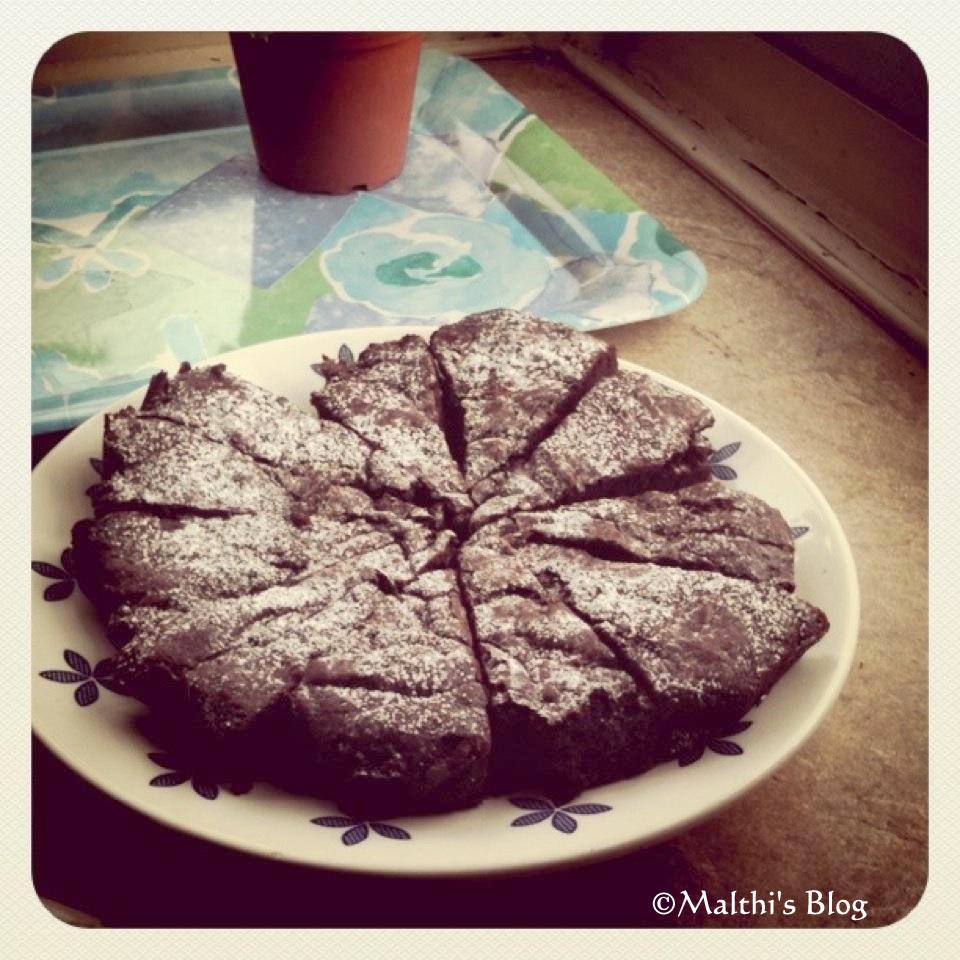
Chewy Brownies

This is one of the best and simple recipes I found after a long time for a brownie. I decided to bake some brownies as I had some left over cocoa powder. I then realized that I had lost all my recipes while moving,  not that I missed my brownie recipe, my brownies were more like brownie-cakes,  they were soft, not dense. Nor were they chewy, but it did taste good. So I started searching the internet for an easy brownie recipe within minimum ingredients and steps and luckily my search was just 2 clicks away and I found the recipe for the Chewiest Brownies from allrecipes.com. The secret to Chewy brownies - no baking powder or soda, now why didn't I think of that! They only ingredient I added were some chopped walnuts.


Ingredients:
  • Unsweetened cocoa powder - 1 cup
  • Melted butter - 1/2 cup
  • White sugar - 2 cups
  • Eggs -2
  • Salt - 1/2 Tsp
  • All-purpose flour - 1 cup
  • Vanilla extract - 2Tsp
  • Walnuts : 1/4 cup (Optional)
  • Icing sugar for decoration - 1/3 cup (Optional)
Steps:
  • Preheat oven to 300 degrees F (150 degrees C). Line pan with greased parchment paper.
  • Combine the cocoa, melted butter, sugar, eggs, salt , flour and vanilla. Mix until well combined. It should be very thick and sticky.
  • Spread mixture into the prepared pan. Bake at 300 degrees F (150 degrees C) for 30 minutes. Cool. 
  • Dust the icing sugar over the brownie using a metal strainer.

Mac n Cauliese (alternate to Mac n Cheese)


Healthy and quick  alternate to Mac n Cheese

I know the name is Cheesy :) but true to the name, the recipe has cauliflower substituted instead of the loads n loads of cream and cheese you add. I came up with this after getting inspiration from watching a show featuring a book called 'Hungry girl', the author talked about replacing carbs with loads of veggies to increase portion size, that way even when your dieting your eating your stomach's full without increasing the calories, smart isn't it? She gave an example of adding cooked cauliflower florets to a small portion of mac n cheese.

 So, I started my search for a healthy version of making mac n cheese so I can add cauliflower in it. I was looking for a recipe which also didn't call for lots of ingredients. I like to cook with ingredients readily available in my pantry, certain ingredients are like one-off gadgets that you rarely use, I hate buying stuff like those as they rot in my fridge after one use.  None of the recipes I found on the internet made that possible, they needed sour cream or heavy cream this and that. So I gave up and told myself I'll do it my way, and lo and behold I was surprised with my creation :) and my husband loved it. 


Here's a list of what you need. Don't worry if you don't have all the veggies mentioned, use what you have. Traditional mac n cheese does not have any, so don't worry, the reason for adding so many veggies is to decrease the amount of pasta (macaroni) and make people eat veggies.
  • Pasta (macaroni) - as required, I use one handful for each person + 1 extra handful
  • Cauliflower - Half cut into florets
  • 1 Onion - finely chopped
  • 4 cloves of Garlic - finely chopped
  • 1 Carrots - diced into small cubes
  • 1 Capsicum / Green Peppers -   - diced into small cubes
  • 5-6 Mushrooms - Halfed
  • Chili sauce -  as preferred 
  • Salt - as preferred 
  • Pepper - as preferred 
  • 1Table spoon oil
  • Grated cheese -  as preferred (quantity n type, I used mozzarella) 
Don't worry, I did  not leave any ingredients behind, there is no need for flour, butter, cream or milk, the cauliflower is gonna be the white sauce! 

Steps:


1. Cook the cauliflower: place cauliflower it in a microwave safe dish, fill 1/4th of the dish with water, add salt. Cover and pop it in the microwave for 10 mins. 

2. In a large vessel bring water to boil, add salt generously then add pasta and cook till tender. While the pasta cooks, heat another pan, add oil and saute the onions and garlic. When the onions changes color, add the chili sauce, little salt and the veggies and stir well.  Add 1/4th cup of water n let the veggies cook.

3. Drain the cooked cauliflower and puree it in a blender/mixer grinder using the water it was cooked in. Add to the veggies, still on stove. Mix well, add pepper as desired. Salt if required.

4. Drain the cooked pasta and add them to the veggies and cauliflower mixture. Turn heat off.

5. Transfer to a oven safe dish. Top with grated cheese and broil on high till the cheese melts and turns light brown. Keep an eye, you don't wanna burn them. And your done.

Enjoy! :)

I took the end product picture in the morning while packing them as  lunch for my hubby.  I made the dish last night for dinner. 


Sunday, June 16, 2013

Quick & Easy Chicken


I've realized that my brain works best when in a hurry :) Here's a really quick and easy chicken recipe I made on the fly this Sunday. I did not have the time to chop onion or tomatoes so I just threw in some ginger garlic paste, salt, chili powder, a spoon of yogurt (curd) for some body and a dash of lime juice stirred in the chicken and let it cook. And the result was a super tasty chicken. 


Here's what you need
  • Oil - 2 tsp
  • Chicken desired amount (I used boneless)
  • Ginger garlic paste - 2tsp
  • salt to taste
  • Chili powder to taste
  • Chicken masala - 1tsp if available
  • Yogurt/curd - 1 tsp
  • Juice of half lime (optional - for a tangy taste)
  • Water - as desired.
Method:
  • Heat oil in a large pan (larger the pan, faster the cooking time). When hot add the ginger garlic paste, salt, chili powder, chicken masala and stir.
  • Add chicken and keep stirring till all pieces are covered in the mixture. Add yogurt and stir.
  • Add a splash of water and close the pan. Let it cook. 
  • Open add the lime juice stir and close. Add a bit more water if the dish dries up before the chicken is cooked.
  • If you need gravy just add more water and cook to the desired consistency. If you like it dry like in the picture, just let it cook without the lid till the water evaporates and dries up.
It goes really well with rice and sambar :) Or make it as a gravy and enjoy with rotis.

Monday, June 10, 2013

Pepper Chicken

 Pepper chicken and rice has been our Friday night regular for quite a while now :) The love for pepper chicken began after we had it once at Wang's kitchen. Its a Hakka (Indo-Chinese) cuisine restaurant. I've always loved Wang's Kitchen, cos my hometown in India has its franchises too. Even though I would not mind eating pepper chicken from Wang's Kitchen every week, I have to admit it may not be the most healthy choice with the deep fried chicken, high sodium content and MSG. So I came up with my own relatively- healthy version of Pepper chicken. It is easy, simple and quick. The steps may seem long, but once you get the hang of it, its easy. Its almost like a 1 pot cooking. I hope you enjoy it as much as I do :)

Ingredients:

Chicken Marinate:
  •  Boneless chicken - As required, chopped into bite size pieces. I use boneless thighs.
  • Corn starch (corn flour) - 2 Tblsp
  • Low sodium Soy sauce - 1 Tsp 
  • Salt - 1/2 Tsp
  • Pepper Powder - 1/2 Tsp
For Sauce:
  •  Oil : 2 Tblsp
  • Chilli sauce - To taste
  • Pepper powder - To taste
  • Salt - To taste
  • Corn starch (corn flour) - 1Tblsp
  • Low sodium Soy sauce - 1 1/2 Tblsp
  • Onion - 1 Chopped (half finely chopped, half of it cubed)
  • Ginger - 1/2 inch, finely chopped
  • Garlic -  3 cloves, finely chopped
  • Green peppers (Capsicum) - 1 or 3/4th chopped, depending on the size. Should not be more than the chicken, can be equal amount.
  • Water - As required.
Steps:
  • Mix the boneless chicken with 1tsp soy sauce, corn flour, 1/2 tsp salt and 1/2tsp pepper powder. make sure all the pieces are coated with corn starch.
  • Heat Oil in a pan on high heat. When oil is hot gently drop all the chicken and fry till all sides are brown. We are not deep frying here, just shallow frying. Just cooking the chicken 3/4th. The aim is to create a brown coating on it.
  • Remove the chicken from the oil. In the same oil in the pan, add the chopped ginger and garlic and saute for a minute.
  • Add onions and green pepper and saute. Add a tiny amount of oil, if you think its drying up.
  •  Now add soy sauce and chilli sauce and saute well till the raw soy smell is gone.
  • Add the fried chicken and saute.
  • Add a splash of water and cover immediately before the steam escapes. Cook for 3- 5 mins.
  • When the chicken is cooking, mix the remaining corn starch with 2 tblsp of water.
  • Now remove the lid and add the cornstarch liquid and stir well. Add pepper powder to your liking.
  • You have 2 choices now. To leave it as a dry dish without gravy (sauce) or to make a gravy (with sauce, like in the pictures). 
  • For a dry dish, saute till the corn starch is cooked. remove from heat without adding any extra water.
  • To make a sauce just add about half cup of water or more and let it cook to the consistency you like. Don worry about adding too much water, it will thicken up because of the corn starch already in it.


Friday, June 7, 2013

Mango Lassi (Mango shake)


You will be surprised to hear that I first had mango lassi in Canada and not in India :) I love yogurt (curd) but never liked the traditional plain lassi. The  thought of sugar and salt in yogurt, nahh, not for me. So I never tried anything termed "Lassi". So when I came to Canada 5 years ago, my husband took me to an Indian restaurant and told me that the place was famous for 'Mango Lassi'. So I reluctantly tried it and fell in love with it. I hope one day I can make my yogurt-hating brother taste my mango lassi :)

There are 2 ways to do it, the traditional way with plain yogurt or my  fool-proof way with Vanilla flavored yogurt. I came up with my way of doing it when my son refused to eat the vanilla yogurt I had bought for him. I had it sitting around for a week when the idea hit me to make mango lassi with the vanilla yogurt. I served it for dinner on my son's birthday and it was a hit :) Don't worry if you don't get vanilla flavored yogurt or mango puree, you can follow the traditional way.

My way:

In my way it is much easier as you don't have to worry about adding sugar or the yogurt being sour.

Ingredients:
  • Vanilla yogurt - 1 tub
  • Mango puree - 1 Can
  • Water or milk - as needed, for dilution
Steps:
  • Blend the mango puree and vanilla yogurt together. You may have to do it in 2 batches if your blender is small. Its 1:1 ratio (1 cup mango-1cup yogurt)
  • Add a little water and blend to dilute the lassi to you liking.
  • Your done. Enjoy :)
Note: Mango puree already has sugar in it and so does vanilla yogurt, so don't add any sugar. Unless you think you need more after tasting it.

Traditional way:

 Ingredients:
  • Fresh Yogurt (curd)
  • Sweet mango slices or mango puree
  • Milk - if yogurt is sour
  • Sugar, as needed
Steps:
  •  If using mango slices, blend it till it has become a puree.
  • Add yogurt and sugar to it and blend again.
  • Add milk if its sour. and blend again.
  • Again it will be 1:1 ratio.

Tuesday, May 28, 2013

Baked Tilapia

From the time we started shopping at Costco, Tilapia has been a regular at home. This is a very simple and easy recipe with everyday ingredients. I think it will work well with any meaty fish. I usually make it without mayonnaise, but I saw an ad on TV sometime back where they used mayonnaise on chicken and decided to use it on the fish and see how it turns out...it was super moist and yummy :)

Ingredients:
  • Oil - 3/4 of a table spoon (I used Olive oil)
  • Skinless tilapia fillet - As required.
  • Salt - to taste
  • Chili powder/ pepper powder - to taste (I used chili powder)
  • Bread crumbs - 2 handfuls (I made my own. Will update recipe soon)
  • Mayonnaise / mayonnaise style sandwich dressing - 1 1/2 tsp for each fillet of fish.
Steps:
  • Preheat oven to 425F
  • Wash fish and pat dry it using a clean kitchen paper towel.
  • Sprinkle salt and rub chili powder on both sides of the fish.
  • Take a baking sheet, line it with parchment or foil (if you like), it makes cleaning easy. Drizzle some oil over it. Place the fish on it.
  • Now apply a thin layer of mayo on fish only on the side facing up. (make sure to take enough mayo out first, don't put the spoon back in the jar after it has touched the fish)
  • Then add the bread crumbs on top of the mayo, until it covers the whole fish. Drizzle oil on top again.
  • Bake for 12-15mins.
  • Broil on high for 1-2 min, just to crisp up the top layer. This step is optional, and watch out, you don't want to burn the fish. I talk from experience.

Monday, April 29, 2013

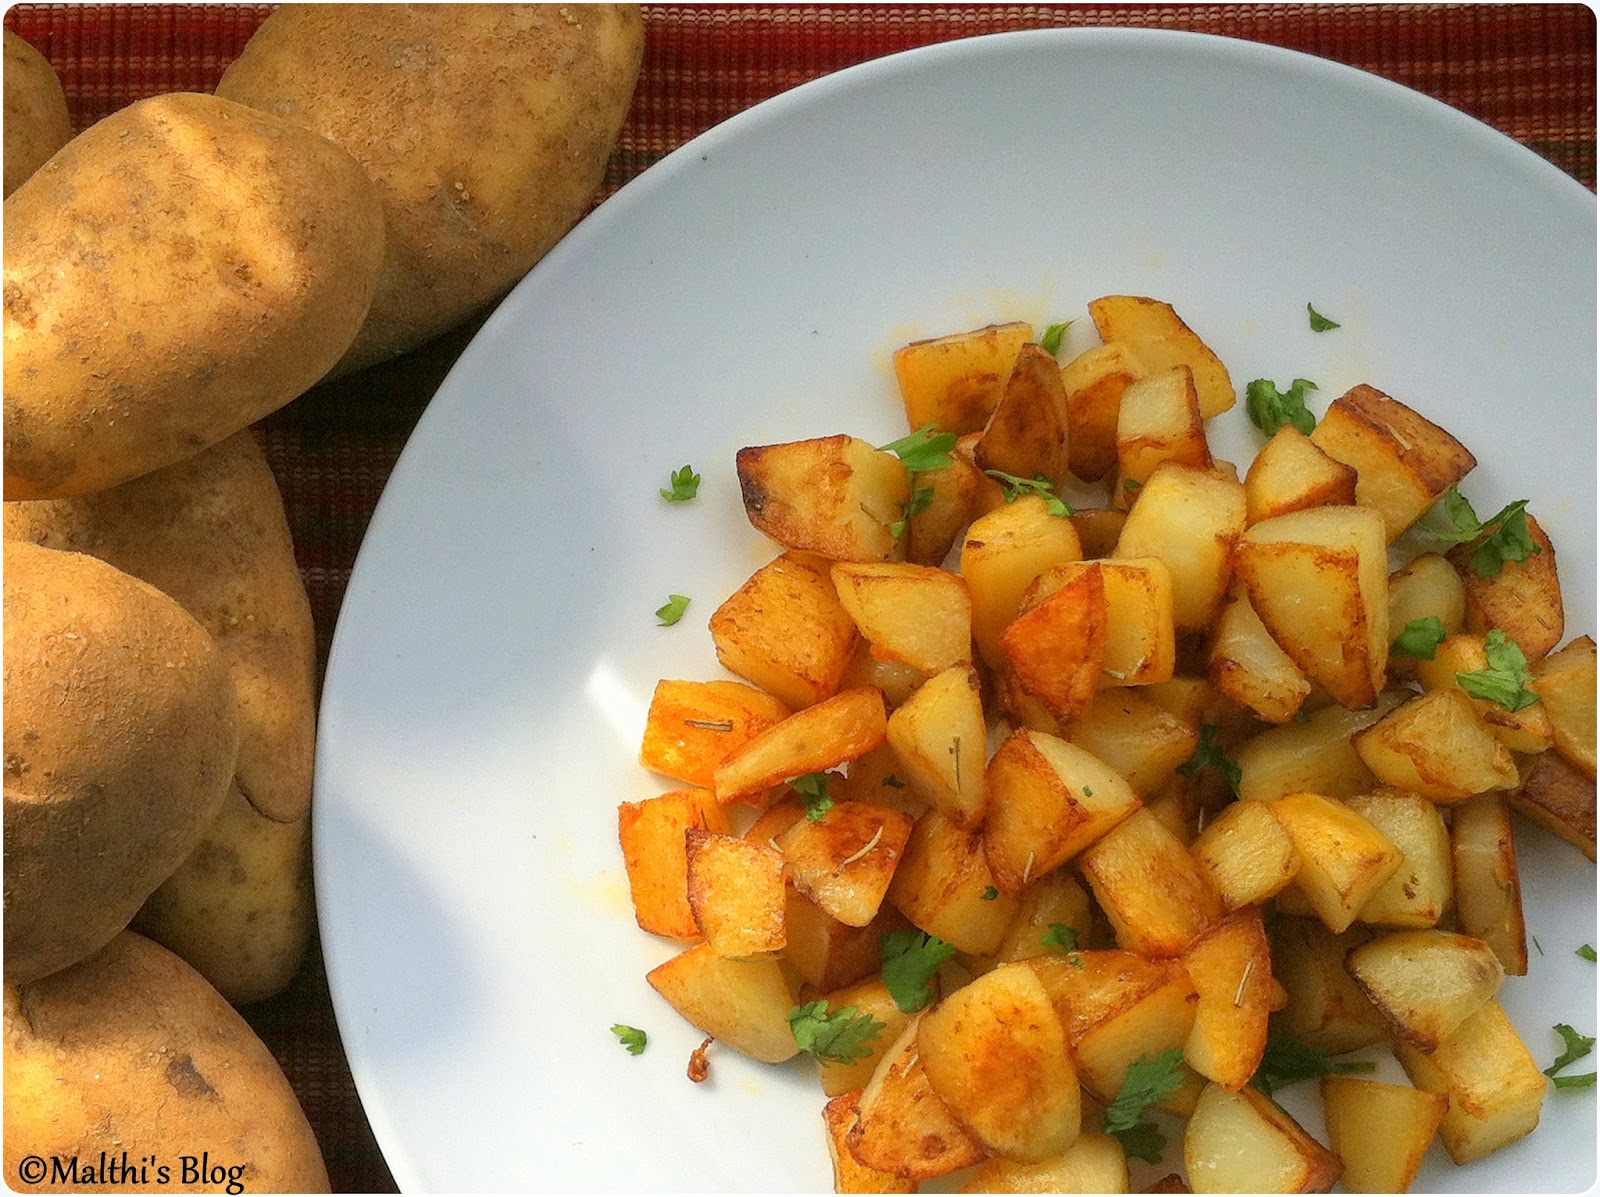
Easy Roast Potatoes


This is an easy and healthy way of making roast potatoes. It needs only half or even less than half the amount of oil usually used to make roast potatoes on the skillet. I  used a herb called Rosemary (seen in the photos like small twigs), just cause I had some. Its not required if you don't have it. It has a very strong taste, but smells good.

Ingredients:
  • Potatoes - Chopped into chucks (about 1 inch) How many ever u need.
  • Salt - 1 Tsp or to taste
  • Chili powder - 1 1tsp or to taste
  • Rosemary - 1/2 tsp (optional) 
  • Oil - 1 tblsp
Steps:

Step 1 - Brown potatoes in pan.
Step 2- Transfer to baking tray and bake for 10mins, at 375 & 400 degs
  • Preheat oven to 375 deg.
  • In a wide pan, heat 3/4th of the oil. When hot add potatoes and stir well till oil adheres to all the chunks.
  • Add salt and chili powder and stir well, again till all the potato chunks are coated well. with your finger, touch a chunk and taste the seasoning, if u feel you need more salt or chili powder add some. Add dry rosemary.
  • Stir ocassionally, let the potatoes brown at least on 2 sides.
  • Once ready transfer to an oiled baking tray. Cover with foil and bake for 5-7 mins.
  • Carefully remove the foil, it will let out a lot of steam. You can see if the potaoes are cooked by putting a knife thru it. If you want to cook it more, replace the foil and cook for few more mins.
  • When cooked, crank up the heat of the oven to 400 deg and place the tray back inside uncovered this time, for 5-7 mins. It will dry any moisture and make a a tasty roast.
  • Take it out and sprinkle some salt.


Friday, April 26, 2013

Chickpeas Sundal


Chickpeas, kondai kadalai, channa... Call it what you want, on a rainy spring day, hot sundal and ginger tea is enough to relax in the evening. Sundal can be made with peas, chickpeas, green gram etc. It means simply tempering with mustard seeds.

Ingredients:

  • Dry chickpeas - 1 Cup
  • Water - enough to cover the chickpeas, around 2 cups
  • Salt - 1 tsp
  • asafoetida powder - 1/2 tsp
  • Cumin seeds - 1 tsp
For tempering:
  • Mustard seeds - 1 tsp
  • Oil - 2 tsp.
  • Urad dal - 1 tsp
  • Dry red chilies - 2 
  • Ginger - grated 1 tsp
  • Coconut - grated 2 tsp 
Steps:

  • Soak chickpeas for 2-3 hours.
  • In a pressure cooker add soaked chickpeas, water, salt, cumin seeds and asafoetifa powder and cook for 10 - 15 mins.
  • After the chickpeas are cooked, heat a pan. Add oil. when oil is hot add mustard seeds, let it crackle. 
  • Then add urad dal, red chilies and ginger.
  •  Add chickpeas and coconut, turn off heat and stir well.
Related Posts Plugin for WordPress, Blogger...